


Spring Pasta Salad with Roasted Vegetables


Spaghetti Aglio E Olio


Ina Garten’s Summer Garden Pasta


Frank Prisinzano’s Sticky Garlic Marinara


Frank Prisinzano’s Spaghetti Limone


Asian Pasta Salad


Lasagna Primavera


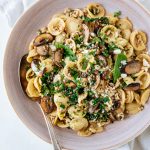
Miso Mushroom Pasta


Valentine’s Day Dinner Recipe Roundup


Delicious Pumpkin Mac and Cheese


Spaghetti with Ricotta and Tomatoes


Simple Mushroom Pasta


Lemon Spaghetti with Spinach


Pasta Alla Vodka


Peanut Noodles With Shrimp


Broken Lasagna Pasta with Meat Sauce


Creamy Baked Macaroni and Cheese


Creamy Mushroom Spinach Fettuccine + Video!


Super Easy Macaroni and Cheese Muffins


Pasta with Tomatoes and Artichokes


Cold Summer Ramen


Summer Pasta Salad with Dijon Vinaigrette


Summer Pasta with Corn


The Best Spaghetti Ever


Cavatappi with Bacon and Roasted Broccoli


Creamy Rigatoni Pasta

WEEKNIGHT PASTA WITH TURKEY AND SPINACH


Instant Pot Cheesy Taco Pasta


Italian Pasta Bake + A Video!
- 1
- 2
- 3
- …
- 5
- Next Page »